
How to get started with Web Development on Windows with the WSL in 2021
In this guide you will learn how to install what I consider to be close to the perfect web development setup for Windows. This includes using the Windows Subsystem for Linux, Windows Terminal, the Node Version Manager as well as some tips and tricks along the way.
Install WSL
Manual Installation
Enable the Windows Subsystem for Linux using this command in Powershell with Admin privileges:
dism.exe /online /enable-feature /featurename:Microsoft-Windows-Subsystem-Linux /all /norestart
If you are on a somewhat recent version of Windows you should be able to install version 2 of the WSL which brings a lot of performance improvements. For that to work you need to enable another Windows feature with:
dism.exe /online /enable-feature /featurename:VirtualMachinePlatform /all /norestart
Restart your computer now and come back once it's done.
Next, you need to install the latest Linux kernal package. Install it once the download has finished.
Finally, in an admin Powershell again run this command to set the default WSL version to version 2.
wsl --set-default-version 2
Next, you can install the WSL distribution of your choice from the Microsoft Store. I use Ubuntu 20.04 LTS which can be found in the Microsoft Store. Once installed, run the distribution from the app launcher and it will install additional files and set up your username and password.
You now have successfully installed Linux on Windows. 🎉
Easy Mode (Available Soon)
If you are running a Windows Insider build (OS build20262 or higher) you should be able to open CMD with admin privileges and type wsl.exe --install. Since you are most likely running a normal Windows build you will have to install this manually like me. I'm looking forward for this functionality to land in normal Windows builds. This new installation command will:
- enable the WSL Windows feature
- Download and install the latest Linux kernel
- Set the WSL version 2 as the default
- Downloads a Linux distribution (default is Ubuntu) and installs it
- To install another distribution try
wsl --list --onlineto see available distributions and use this command to specify the distributionwsl --install -d <Distribution Name>
- To install another distribution try
You now have successfully installed Linux on Windows. 🎉
VS Code
Download VS Code and install it.
WSL Extension
In order to work from within the WSL you need to install the Remote - WSL extension for VS Code. This will most likely be prompted anyways when you open VS Code after the WSL has been installed. After installing that you can also open workspaces from the terminal by running code FOLDER . Any integrated terminals in VS Code will then also use the WSL distribution.
Windows Terminal
To make life easier we can use the Windows Terminal app to make navigating the command line more pleasant.
Open the Microsoft Store and search for "Windows Terminal". Install and open the app.
To set Ubuntu as the default when opening Windows Terminal open the Settings (CTRL-Komma) and look for Ubuntu in the profiles list. I recommend using VS Code to edit the settings.
{
  "guid": "{07b52e3e-de2c-5db4-bd2d-ba144ed6c273}",
  "hidden": false,
  "name": "Ubuntu-20.04",
  "source": "Windows.Terminal.Wsl"
}
Copy the guid and paste it as the default profile at top of the file.
"defaultProfile": "{07b52e3e-de2c-5db4-bd2d-ba144ed6c273}",
Theme and Font
If you want you can adjust the font and color theme of Windows Terminal. I use the Cascadia Code font everywhere which supports Powerline Glyphs. This is quite handy when using some zsh themes. You can download the font here. Extract the files and install the four font files from the TTF folder. After that you can change the font family in the Windows Terminal settings. That being said you don't need a custom font if you don't want to use a theme with Powerline Glyphs.
"profiles": {
    "defaults": {
      // Put settings here that you want to apply to all profiles.
      "fontFace": "Cascadia Code PL"
    },
		...
}
I also use the Dracula theme pretty much everywhere. If you want you can add the color scheme to the settings like this:
"profiles": {
			...
},
"schemes": [
    {
      "name": "Dracula",
      "cursorColor": "#F8F8F2",
      "selectionBackground": "#44475A",
      "background": "#282A36",
      "foreground": "#F8F8F2",
      "black": "#21222C",
      "blue": "#BD93F9",
      "cyan": "#8BE9FD",
      "green": "#50FA7B",
      "purple": "#FF79C6",
      "red": "#FF5555",
      "white": "#F8F8F2",
      "yellow": "#F1FA8C",
      "brightBlack": "#6272A4",
      "brightBlue": "#D6ACFF",
      "brightCyan": "#A4FFFF",
      "brightGreen": "#69FF94",
      "brightPurple": "#FF92DF",
      "brightRed": "#FF6E6E",
      "brightWhite": "#FFFFFF",
      "brightYellow": "#FFFFA5"
    }
],
Now you can apply the color scheme just like the font earlier.
"profiles": {
    "defaults": {
      // Put settings here that you want to apply to all profiles.
			"colorScheme": "Dracula",
      "fontFace": "Cascadia Code PL"
    },
		...
}
VS Code Font and Theme
This step is completely optional again but if you chose to adopt some of the theme choices mentioned earlier I want to show how to use them in VS Code too.
In the VS Code settings use Cascadia Code as the font family (without the PL) and enable font ligatures if you want (I like them). Then set the Terminal > Integrated: Font Family to Cascadia Code PL to show Powerline Glyphs in the integrated terminal. Finally if you search for "Dracula Official" in extensions you can install this color theme to match your terminal.
Installing Zsh and oh my zsh
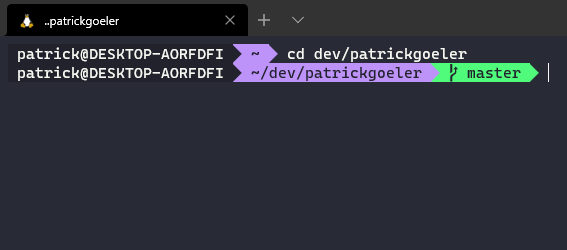
The Z shell together with the oh my zsh framework can make life in the command line easier and prettier. There are many themes and plugins to choose from but I mainly use it to easily switch between themes.
In order to use oh my zsh the Z shell needs to be installed and set as the default shell first.
sudo apt install zsh
You can verify the installation with zsh --version .
To install oh my zsh run this command:
sh -c "$(curl -fsSL https://raw.githubusercontent.com/ohmyzsh/ohmyzsh/master/tools/install.sh)"
This will ask you if you want to change your default shell. Say yes to this.
And this should be everything to get started with oh my zsh. You can set a theme or add plugins by editing ~/.zshrc but the defaults are good to get going. I'm running the "agnoster" theme at the moment. Double check that you are in the ~ directory because the default will put you in a different directory.
Node Version Manager
Everybody who worked with Node in the past knows that different node versions can sometimes be a pain. The Node Version Manager makes it easy to switch between Node versions.
Simply run this command:
curl -o- [https://raw.githubusercontent.com/nvm-sh/nvm/v0.37.2/install.sh](https://raw.githubusercontent.com/nvm-sh/nvm/v0.37.2/install.sh) | bash
and add this to ~/.zshrc:
export NVM_DIR="$([ -z "${XDG_CONFIG_HOME-}" ] && printf %s "${HOME}/.nvm" || printf %s "${XDG_CONFIG_HOME}/nvm")"
[ -s "$NVM_DIR/nvm.sh" ] && \. "$NVM_DIR/nvm.sh" # This loads nvm
Restart the terminal or source ~/.zshrc and check the nvm installation with nvm -v. If everything worked you can run nvm install node to install the latest version. If you need to switch another version you can simply run nvm install version and then nvm use version where version would be a number like 12.
Optionally you can install yarn with npm install -g yarn if you prefer that over npm.
Git and Build Tools
While we are installing some stuff you can run sudo apt install build-essential to install some build tools that are required sometimes.
If you want you can also configure git to your liking. E.g. create SSH keys for Github or configure the config with:
git config --global user.email "[email protected]"
git config --global user.name "Your Name"
And this is it! 🎉
You should now have a Linux distribution running in the WSL version two with the basic tools installed to get started with Web Development in 2021. If you want you can check out something like Freecodecamp to start learning anything you want. This setup should make it easy for you to install and run anything you need. Keep in mind to look for installation guides for Ubuntu and not Windows since your code will be running inside of Ubuntu. Thank you and feel free to get in touch on social media if you have any questions or suggestions 👋.